Note: Google Authenticator only works on iOS, Android, Windows Phone, webOS, PalmOS, and BlackBerry devices. In other words you will need your smart phone to login to your website.
How Does it Work?
Normally passwords can be cracked. If you are using the same password on numerous websites, a security leak on one put your other accounts in danger. Often people are lazy, and they don’t change their passwords even after they get an email about security compromise on a major site.
Well, the 2-step verification is the solution just for that. Even if the hacker knows your WordPress username and password, they will not be able to access your site unless they have a time restrained random security code (provided by Google Authenticator).
Because your blog is directly connected with your mobile device, you will be the only person with access to retrieve the unique code for each login. The code expires in a short amount of time for security purposes.
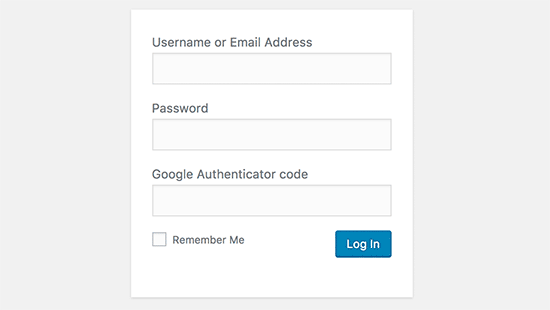
Once we are done with this tutorial, there will be an additional field on your WordPress login page like this which will improve your WordPress security:

How to Add Google Authenticator in WordPress
First thing you need to do is install Google Authenticator app on your phone. We are going to use the iOS terminology for the sake of this tutorial, but the process is similar for other devices as well. Visit the App store and search for “Google Authenticator”. Download and Install the application.
Now let’s get back to your WordPress dashboard. We will re-visit Google Authenticator app once we are done with the setup on the WordPress end.
Let’s install and activate the Google Authenticator plugin for WordPress. For more details, see our step by step guide on how to install a WordPress plugin.
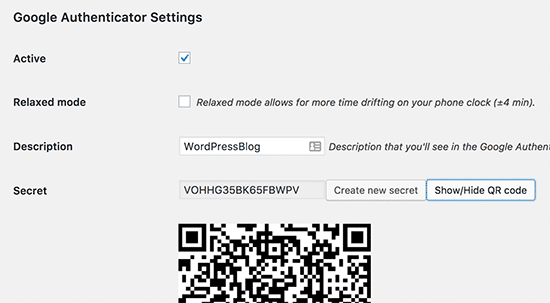
In the WordPress menu, click on Users » Your Profile. You will see Google Authenticator Settings there.

Active – If you check this box, then it means that your blog is now going to use Google Authenticator. (Check this box once you are done with the entire setup)
Relaxed Mode – Normally your Google authenticator code expires every minute. Using the relaxed mode will allow you to use one code for upto 4 minutes. We don’t recommend turning this on unless you type very slow. The code is only 6 characters long, so you should be able to do it in 1 minute.
Description and Secret Key – These options are pretty self explanatory. The description will act as your account name in the Google Authenticator app. The secret key is needed if you are not using the QR code. Note: When using iPhone, you can’t spaces in your description. If you do add spaces, then the QR code may not work and you will need to use the key to enter the information in our application manually.
Enable App Password – You need this only if you are using XML-RPC (remote publishing) on your blog. This means WordPress iOS app, or Windows Live Writer. Remember, that enabling that will decrease your overall login security, but if you really like using remote publishing, then keep on using it. Just enable this option and set an application password.
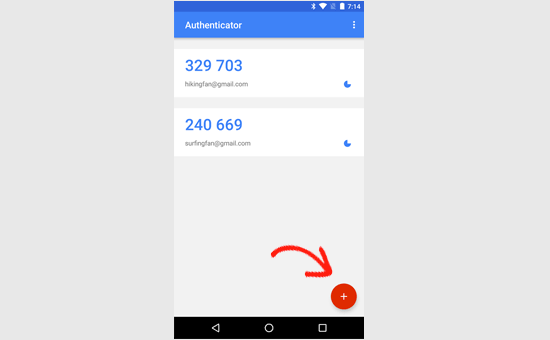
Now that we have the WordPress part configured, lets get back to our iPhone App Google Authenticator. Click on the Google Authenticator app icon and then click on the + icon to add a new account.

You will be asked to either scan the QR code or enter the provided key. You can get both these from Google Authenticator settings on your website.
Scan Bar Code if your description doesn’t have any spaces. Click Show QR code button in WordPress to see the QR code.
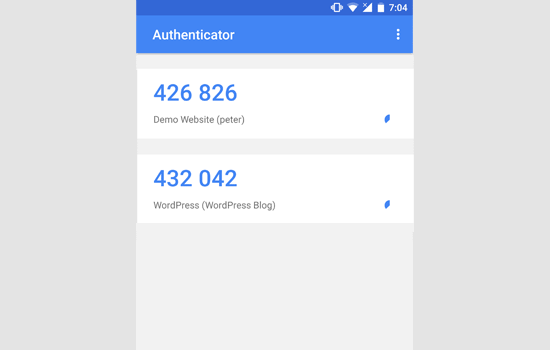
As soon as you scan the bar code or enter the Secret key, your WordPress blog description will appear in Google Authenticator. It will show you a random string of 6 digits with a 1 minute counter next to it.

Now when you login, you will see a two-step verification field that asks for Google Authenticator code.

This works for multi-author blogs as well. Each author gets their own secret key, so they can set it on their device. What are you waiting for? Use 2 step verification on your blog to improve WordPress security.
Lastly, we recommend everyone to turn on 2-step verification on their Google accounts. You can also configure that with Google Authenticator as shown on this tutorial.
